Create a Plan
You can add new plans to a product at any time, and there is no limit to the number of plans you can have available for your product.
To create a new plan, select Products from the navigation menu, choose the product you want to create a plan for, go to the Plans tab, and click Create Plan.
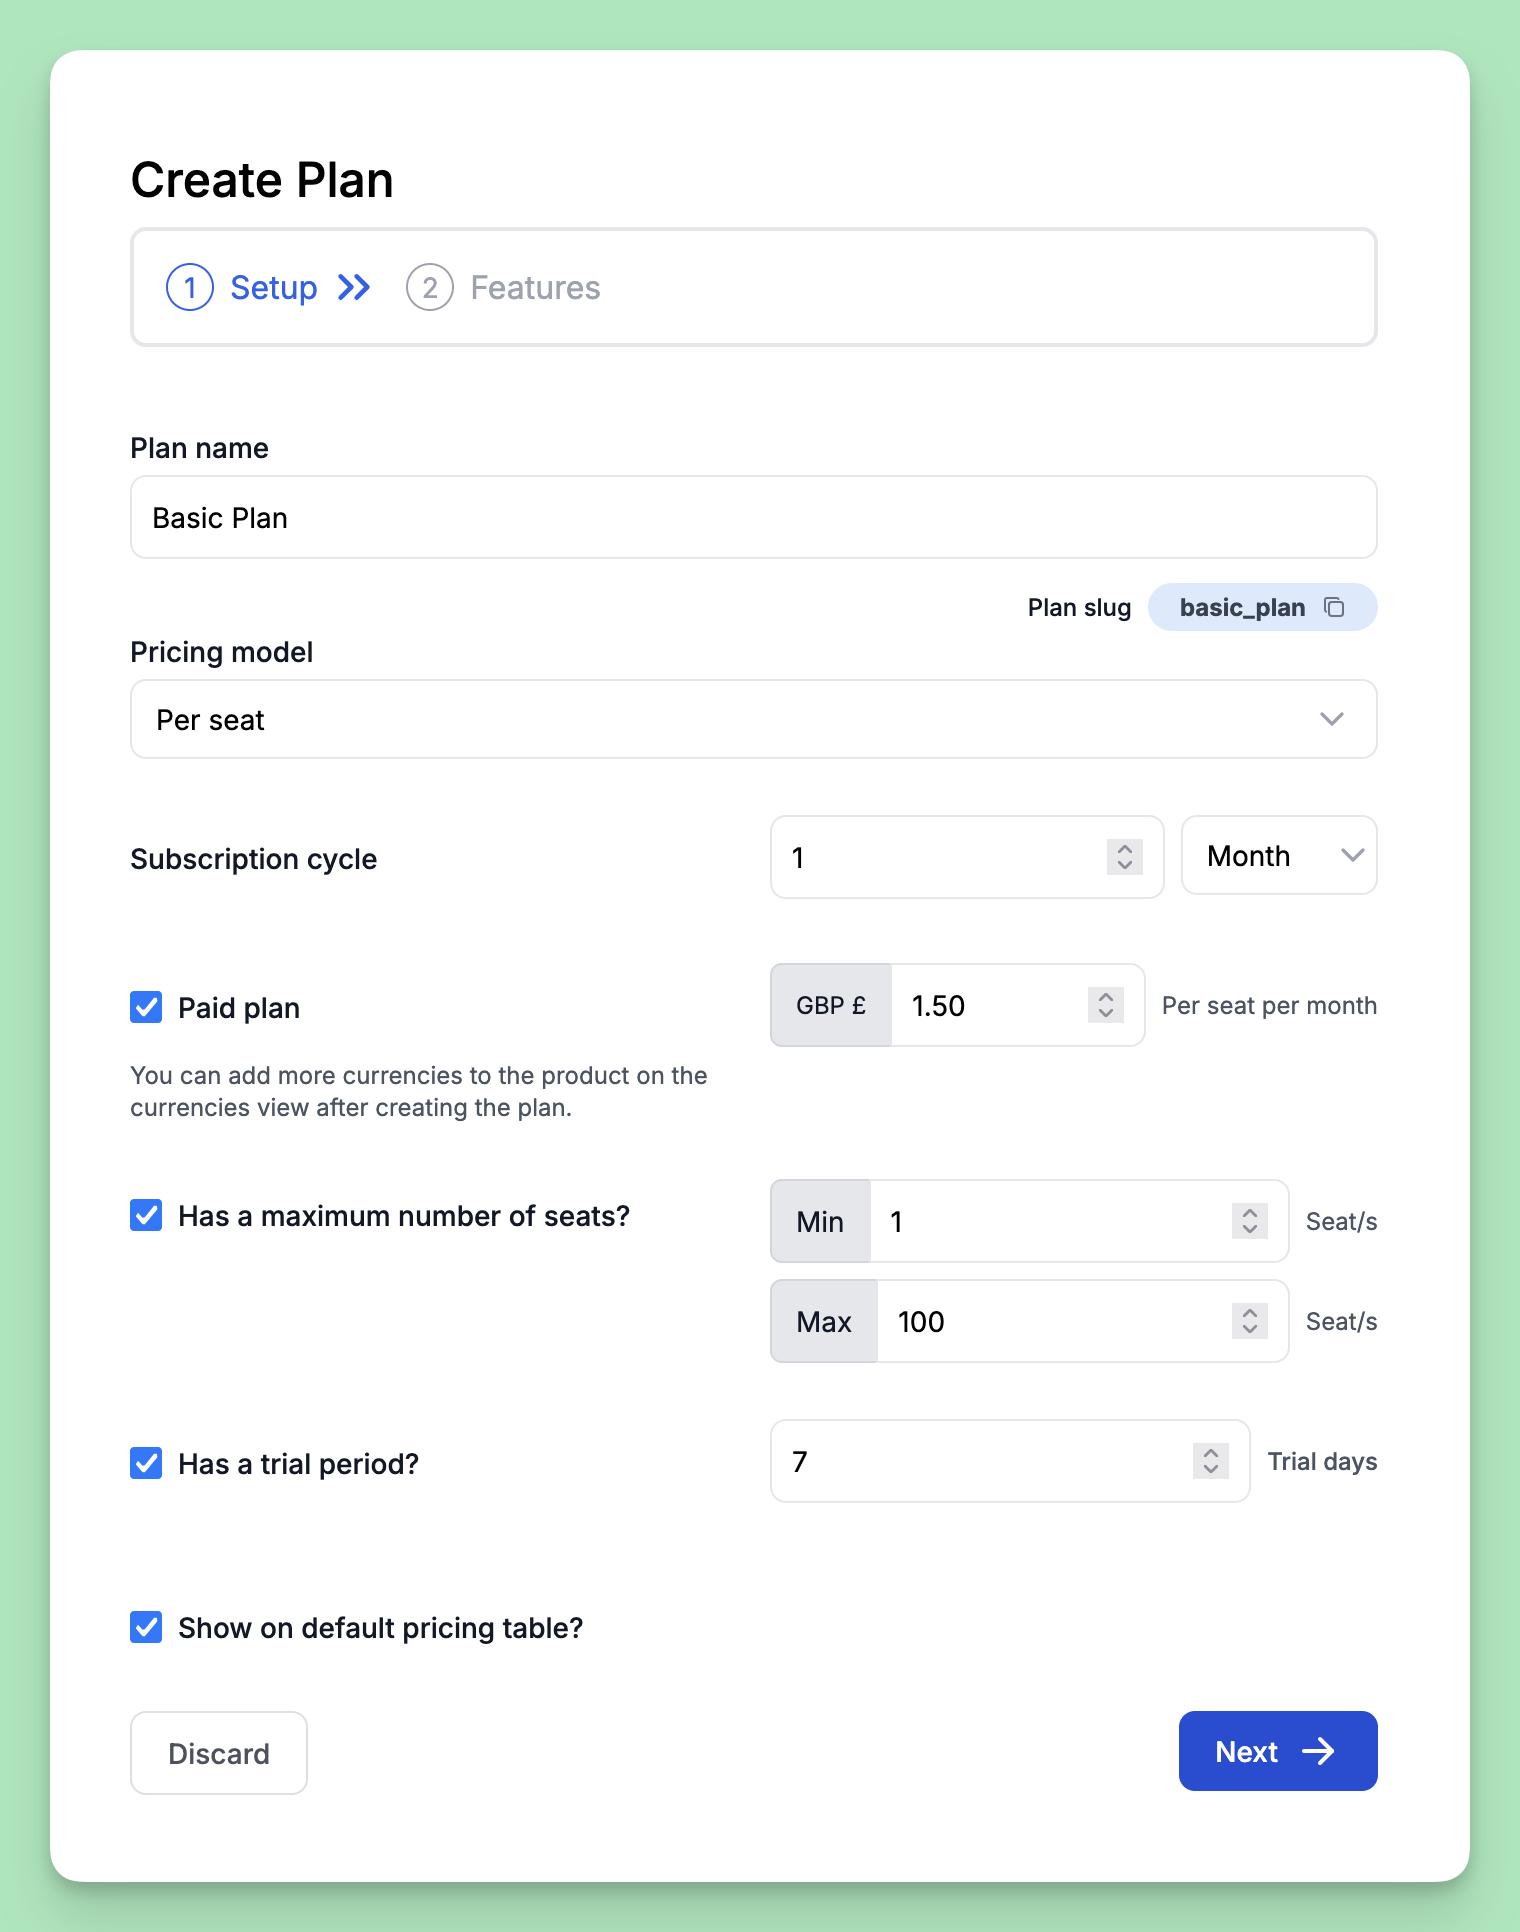
There are two steps to adding a plan to a product. First is the setup, where you define the name and pricing details of the plan. Then you can add features to your plan.
Setup
To create a new plan:

- Give your plan a name. This name is used throughout the Salable dashboard. The Plan slug, which is how our API and various SPKs reference the plan, is automatically generated. You can copy the name of the plan slug to your clipboard by clicking on the copy icon beside the plan slug.
- Select a pricing model. Your choices are:
- Set how long your subscription cycle is. You can define it in days, months, or years.
- Decide whether this is a paid plan. If it is, you can set the price per subscription cycle.
- If your plan uses per seat pricing, you can set the minimum and maximum number of seats that the customer can use on this plan.
- Decide whether a trial period is available for your plan and, if so, how long it lasts.
- Set whether this plan shows on the default pricing table for your product.
- Click Next to add features to the plan.
Features
Features allow you to control access to your app's functionality. Users who subscribe to a plan are granted access to its feature set. You can add as many features as you want to your plan.
If you have already created product features, you can select from your existing features at this stage.
If you do not have any features, or if you want to create a new feature for your plan, click the Create Feature + button.
Provide a name for the feature, decide what information it uses, and provide a default value for when the feature is applied to plans. The information can be one of three types:
- Boolean - This has either a True or False value.
- Text - This is a free text field, and can have whatever value you want.
- Numeric - This can have any numeric value, with an option to include unlimited as the value.
Once you're happy with the setup and features of your plan, click Create Plan to add the plan to your product.
The plan is now shown in the Plans tab. You can edit, clone, or generate a checkout link for your plan from the Plans tab.